When an LED flood light suddenly goes dark, the cause is rarely mysterious. It may be a loose terminal, failed driver, blocked airflow, or water inside the housing. Learning how to troubleshoot LED flood lights helps you identify the fault without replacing good equipment too early.
Lighting engineer James R. Benya has emphasized, “LEDs are not light bulbs; they are electronic devices.” That distinction matters. An LED fixture depends on its driver, wiring, seals, heat management, and control system. A burned-out lamp is not always the real problem. Sometimes, the fixture is only showing the symptom.
This guide presents seven practical checks, based on common field experience and manufacturer service principles. You will examine the power supply, circuit breaker, connections, photocell, driver, heat buildup, and moisture damage. Use a non-contact voltage tester before touching wiring, and isolate power when inspection requires open terminals. Never guess with live electricity.
Look closely.
A flickering light may point to unstable input voltage or a failing driver. Darkened lenses can suggest excessive heat or aging components. Water droplets inside the housing deserve immediate attention. However, not every visual clue tells the whole story. Testing is essential, and assumptions can waste time.
The process is deliberately practical, but it is not perfect. Different brands use different drivers, controls, and sealing methods. Always compare your findings with the installation manual and the fixture’s rating label. With careful observation, basic testing, and a willingness to question the first diagnosis, you can restore reliable lighting more safely and efficiently.
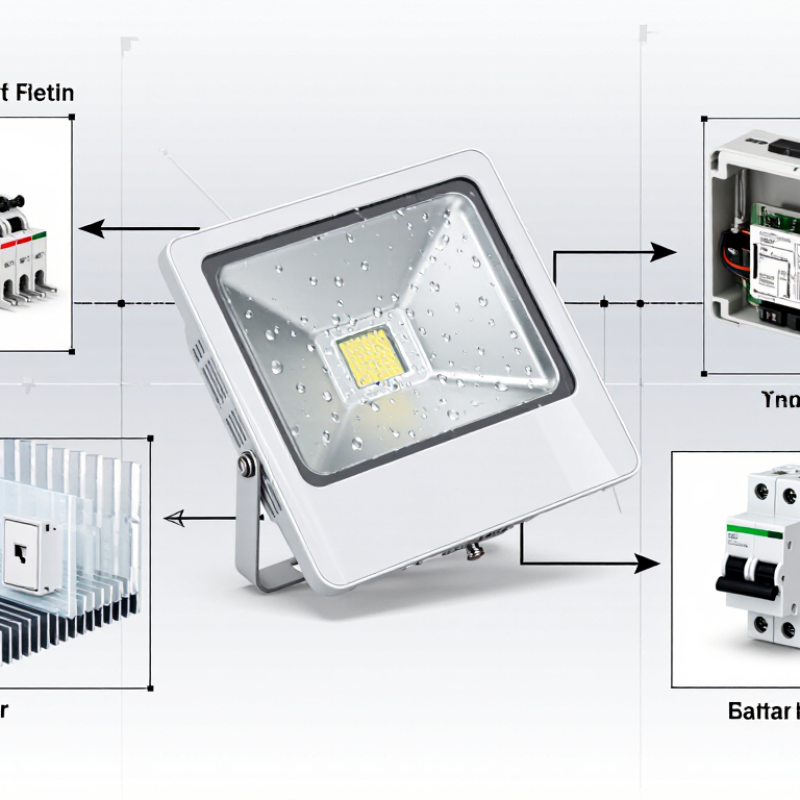
7 Best Ways to Troubleshoot LED Flood Lights
Identify the LED flood light problem before replacing parts. Observe the exact symptom: no light, flickering, dim output, or delayed startup. I have found that a dark fixture often has a simple power issue, not a failed LED module. Check the wall switch, timer, photocell, and circuit breaker. A tripped breaker may indicate overload, moisture, or damaged wiring. Do not reset it repeatedly.
Turn off the circuit before inspecting terminals, cables, or junction boxes. Look for loose wires, melted insulation, corrosion, or water inside the housing. Restore power only when the connections appear secure. If you are trained, measure voltage with a suitable meter and compare it with the fixture’s rating. Never test exposed live wiring casually. An incorrect reading can mislead you, especially when a switch or sensor interrupts the circuit.
Tips: Test the outlet with another safe device. Confirm the flood light receives the correct voltage. Remove incompatible dimmers or controls temporarily. Check for a loose neutral connection. Keep the inspection practical. I sometimes overlook the photocell because it looks harmless. Covering it briefly can confirm whether daylight control is blocking the lamp. Stop testing if you smell burning, see arcing, or find damaged insulation. A qualified electrician should investigate those conditions.
| Step | Common Symptom | What to Check | Recommended Action | Typical Result or Next Step | Difficulty |
|---|---|---|---|---|---|
| 1 | The flood light is completely off. | Check whether other devices on the same circuit are working. Inspect the circuit breaker, fuse, wall switch, timer, or photocell. | Reset a tripped breaker once, replace a blown fuse with the correct rating, and confirm that the switch or control device is turned on. | If the light operates normally, the problem was likely caused by a switched-off control or interrupted circuit. If the breaker trips again, stop resetting it. | Basic |
| 2 | No power reaches the light fixture. | Use a suitable voltage tester or multimeter to check the supply at the switch box, junction box, or fixture connection. | Verify that the measured voltage matches the fixture's rated input voltage. Tighten accessible connections only after the circuit is switched off and verified de-energized. | No voltage indicates an upstream wiring, switch, breaker, or control problem that may require a qualified electrician. | Inspection |
| 3 | The light flickers, pulses, or turns on and off. | Look for loose terminals, damaged cables, moisture in the connection box, incompatible dimmers, or unstable power. | Turn off the power, inspect for corrosion or loose wiring, and remove incompatible dimming or control equipment. Replace damaged cable or seals. | Persistent flickering can indicate a failing LED driver, poor connection, or voltage fluctuation. Professional testing may be needed. | Inspection |
| 4 | The light is dimmer than before or only part of the fixture illuminates. | Check the lens for dirt, the LED board for darkened sections, and the driver output if the fixture is designed for service access. | Clean the lens with a soft, dry or slightly damp cloth. Do not bypass the driver or connect the LED board directly to the supply. | A dirty lens can reduce perceived brightness. Dark LED sections or incorrect driver output usually indicate component failure. | Inspection |
| 5 | The fixture becomes excessively hot, shuts down, or cycles after warming up. | Inspect ventilation space, mounting orientation, heat-sink fins, and nearby materials that may block heat dissipation. | Remove dust and obstructions, maintain the required clearance, and ensure the fixture is mounted as specified by its electrical and installation ratings. | Many LED flood lights reduce output or shut down temporarily when overheated. Repeated thermal shutdown can shorten driver and LED life. | Inspection |
| 6 | The light has water inside, corrosion, or operates unreliably outdoors. | Examine the housing, lens, cable entry, gasket, junction box, and conduit for cracks, gaps, or condensation. | Disconnect power, dry the area only when safe, replace damaged seals or the fixture, and correct cable entries so water cannot run into the housing. | Outdoor fixtures need suitable ingress protection for their location. A wet or corroded fixture should not be energized until inspected. | Service |
| 7 | Basic checks do not restore normal operation. | Check the LED driver, internal wiring, surge damage, thermal damage, and compatibility with the supply and control system. | Replace the driver or complete fixture only with a correctly rated part. Do not open sealed equipment or perform live repairs without proper qualifications. | If the circuit supply is correct but the fixture remains faulty, internal component failure is likely. Contact a qualified electrician or authorized service provider. | Service |
Check the wall switch, timer, photocell, and circuit breaker. Test the outlet with another safe device. A dark fixture may have a power problem, not a failed LED module.
Do not reset it repeatedly. Overload, moisture, or damaged wiring may be involved. Turn off the circuit and contact a qualified electrician for further inspection.
Turn off the circuit breaker before opening terminals or junction boxes. Confirm the wires are de-energized with a suitable tester. Look for loose wires, melted insulation, corrosion, or darkened copper.
Check for loose terminals, a weak neutral connection, or an incompatible dimmer. Incorrect voltage can also cause flickering. A connection may work briefly, then fail as the light warms.
Yes. Clean the lens and review the settings. Covering a photocell briefly may show whether daylight control is blocking the lamp. I sometimes overlook this simple detail.
Blocked vents, dust, or a tight enclosure can trap heat. A deteriorating internal driver may fail after warming. Let the fixture cool before inspecting it.
Check the lens seal, cable entry, and mounting points. Droplets, rust, and white corrosion suggest water intrusion. Drying the housing may not repair hidden damage.
Confirm that screws are tight and the fixture remains stable. Check the cable strain relief and grounding connection. A tilted light may collect water instead of shedding it. Recheck everything.
Learning how to troubleshoot LED flood lights starts with identifying the exact symptom, such as no light, flickering, dim output, or unexpected activation. Begin by checking the power supply, circuit breaker, outlet, switch, and control settings. Then inspect wiring, terminals, connectors, and grounding for loose, damaged, or corroded parts. Testing the LED driver, motion sensors, timers, and other internal electrical components can help determine whether the fault comes from a control device or the light itself.
You should also examine the fixture for overheating, blocked ventilation, moisture, dust, impact damage, or incorrect installation. Environmental conditions and poor mounting can shorten the service life of an LED flood light. After locating the problem, disconnect power before making any repair, replace only damaged components with suitable parts, and avoid working on energized circuits. Finally, restore power and confirm stable brightness, correct sensor operation, secure connections, and reliable performance over time.

 Tverse LED light