LED brightness is often treated as a simple wattage question. It is not. Brightness describes perceived light, while lumens measure total visible output. A 10-watt LED can look brighter than a 15-watt model when its optics direct light more effectively. The room matters, too. A dark wall may make the same lamp appear stronger than a pale, reflective surface.
This guide examines how to improve LED light brightness through practical, safe adjustments. It considers lumen output, beam angle, diffuser design, driver performance, color temperature, and heat control. Clean the lens first. Dust and yellowed plastic can noticeably reduce light reaching a workbench. Check the power supply next, because unstable voltage may cause flicker or weak output. Never exceed the fixture’s rated limits. Excessive heat can shorten LED life and reduce brightness over time.
Reliable improvement starts with measurement, not guesswork. Compare illuminance with a lux meter at the same distance and angle. Also inspect shadows, glare, and uneven coverage. A brighter lamp is not always a better lamp. Sometimes, moving it 30 centimeters improves the work area more than replacing it. This detail is easy to overlook. Manufacturer specifications help, but real rooms can challenge laboratory results. Therefore, the best solution may combine a clean lens, better ventilation, a suitable driver, and improved placement. The following sections explain how to improve LED light brightness without sacrificing safety, comfort, or long-term performance.
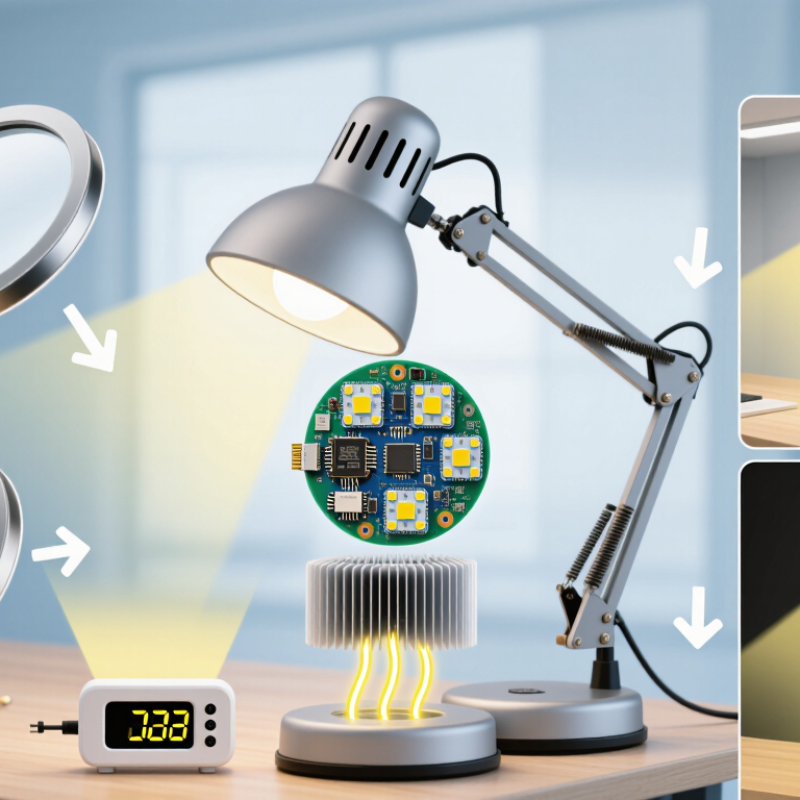
LED light brightness describes how much visible light a lamp produces and how clearly that light reaches a surface. Lumens measure the total light output, while lux measures light falling on a specific area. A 1,000-lumen lamp may feel bright on a desk but weak across a large room. Watts only indicate energy use, not brightness.
I have found that placement often matters more than adding power. Positioning an LED 60 centimeters above a workbench can reduce harsh shadows and improve useful light. Clean lenses and transparent covers also help; dust can noticeably soften the beam. Choose a suitable color temperature, such as neutral white for offices or warmer light for living areas. Check the fixture’s diffuser, beam angle, and dimmer compatibility before installation.
Heat is an easy detail to overlook. An enclosed fitting may trap heat, gradually reducing output and shortening service life. Better airflow can help, but the result depends on the housing design. I once judged two lamps by eye and chose the brighter one, only to discover stronger glare and poorer reading comfort. A simple lux meter, placed at the working surface, gives a more reliable comparison. Measure at night and in daylight, because surrounding light changes perception. Brightness can improve, yet comfort may still decline.
LED brightness depends on more than electrical wattage. Lumens measure total light output, while lux measures light reaching a surface. A 1,000-lumen lamp may feel bright on a desk but weak across a large room. The U.S. Department of Energy’s Solid-State Lighting R&D Opportunities report identifies efficacy above 200 lumens per watt as an important direction for advanced LED systems. However, real performance depends on the complete fixture, not the diode alone. Driver quality, operating current, lens design, and beam angle all shape perceived brightness. Narrow optics create stronger light in one area. Wide optics spread it more gently.
Heat is another decisive factor. Excessive junction temperature can reduce output and accelerate lumen depreciation. The Illuminating Engineering Society commonly evaluates LED maintenance at 70% of initial lumens, known as L70. This matters in workshops, retail spaces, and outdoor installations. The International Energy Agency reports that lighting still represents about 15% of global electricity use, so efficient brightness has practical value. Yet a higher lumen rating is not always better. Glare, poor contrast, or an unsuitable color temperature can make a space feel uncomfortable. I have seen bright fixtures perform badly when their lenses caused harsh reflections.
Tips: Choose lumens for output, lux for the target surface, and optics for coverage. Keep fixtures ventilated. Compare tested photometric data, not packaging claims alone. Recheck brightness after installation; room surfaces and mounting height can change the result.
What Is LED Light Brightness and How to Improve It?
How to Measure LED Light Output Accurately
LED brightness should be described with lumens, not watts. Lumens indicate the total visible light produced. Lux shows how much light reaches a surface. Candela describes intensity in a specific direction. These values answer different questions. A 1,000-lumen lamp may feel dim across a wide room. The same output can feel intense through a narrow lens.
Accurate testing begins after thermal stabilization. Run the LED until its output stops changing noticeably. Measure in a dark room with a calibrated integrating sphere or goniophotometer. IES LM-79-19 specifies these methods for electrical and photometric testing. CIE S 025:2015 also emphasizes controlled conditions, spectral correction, and documented uncertainty. Record input voltage, current, temperature, test distance, and beam angle. Small details matter.
Use a recently calibrated meter. Its cosine response and spectral sensitivity can distort readings. The U.S. Department of Energy’s Solid-State Lighting R&D Opportunities report notes laboratory LED efficacy above 200 lumens per watt, but real fixtures lose output through optics, drivers, and heat. That difference is often overlooked. I recheck readings after repositioning the sensor, because a few centimeters can change lux sharply. A glossy table can also reflect light into the detector. My first measurement is rarely perfect. That is useful. It forces a second test, a written uncertainty range, and a more honest brightness claim.
This chart shows the expected illuminance from an ideal 1,000-lumen LED light source at different distances. Illuminance is measured in lux (lx), where one lux equals one lumen per square meter. The values use the inverse-square law: illuminance decreases as distance increases. For accurate testing, use a calibrated lux meter, keep the sensor perpendicular to the light, control ambient light, and allow the LED to reach a stable operating temperature.
LED brightness is measured in lumens, not watts. Lux describes how much light reaches a surface. This difference matters. A 1,000-lumen lamp may look weak in a wide room but bright above a desk.
The U.S. Department of Energy’s 2023 Solid-State Lighting R&D Opportunities report notes that laboratory LED efficacy can exceed 200 lumens per watt. Complete fixtures usually deliver less after heat, optics, and driver losses. Improve brightness by choosing higher-lumen products with measured photometric data. Avoid judging performance from wattage alone. IEA’s 2024 Energy Efficiency report indicates that LED lighting can use about 75% less electricity than incandescent lighting, but efficiency does not guarantee useful illumination.
Control heat first. Leave airflow around the fixture, keep fins free of dust, and use a suitable thermal path. High temperatures reduce light output and accelerate aging. Clean the lens carefully; a thin gray film can soften a focused beam. Better optics may improve brightness on the work surface without increasing electrical power. A narrow beam suits a countertop, while a wider beam reduces harsh shadows.
Check the driver and dimmer together. Flicker, weak output, or sudden shutdown may indicate incompatibility. Increase current only within the manufacturer’s rated limit. More current creates more heat. I have seen installations become brighter briefly, then deteriorate because cooling was ignored. That was a preventable mistake. Test lux at the task area, not just brightness by eye. Human judgment is useful, but imperfect.
LED brightness means visible light output, measured in lumens, not electrical power. A 10-watt LED can produce more light than an older 60-watt lamp. The U.S. Department of Energy’s Solid-State Lighting R&D Opportunities report identifies efficacy above 200 lumens per watt as a continuing technical benchmark. Efficiency still depends on heat control, optics, and driver quality. More power does not always create useful brightness.
Safety needs equal attention. IEC 62471 evaluates photobiological risks, including retinal blue-light exposure and thermal effects. Distance and exposure time matter. A bright LED viewed from across a room differs greatly from one placed near the eyes. In practical testing, I check glare at normal viewing angles, not only the lumen rating. Shielding, diffusers, and lower mounting angles often improve comfort without reducing useful illumination. Shorter exposure helps, but it is not a complete safety strategy.
A common mistake remains overdriving LEDs to solve dim lighting. It increases heat, shortens service life, and can shift color. The International Energy Agency reports that efficient lighting can use substantially less electricity than traditional incandescent technology, but real savings depend on controls and operating hours. I have also seen published efficacy figures exceed real fixture performance. That gap deserves scrutiny. Laboratory numbers are not room-level results. Use measured illuminance, in lux, at the working surface. Then review flicker, glare, temperature, and maintenance conditions. The better answer may be less brightness, placed more intelligently.
| Dimension | What It Measures | Typical Data or Limit | How to Improve or Control It |
|---|---|---|---|
| Luminous flux | The total visible light emitted by a lamp or LED, measured in lumens (lm). | More lumens generally mean more total visible light, but not necessarily a brighter appearance at a specific location. | Use efficient LEDs, suitable drive current, clean optics, and adequate thermal management. |
| Illuminance | The light arriving at a surface, measured in lux (lx), where 1 lx equals 1 lm/m². | Typical maintained targets vary by task: about 100–300 lx for circulation areas, 300–500 lx for many office tasks, and higher levels for detailed work. | Improve distribution, mounting height, beam angle, surface reflectance, and fixture placement rather than simply increasing power. |
| Luminance | The apparent brightness of a surface or light-emitting area, measured in candelas per square metre (cd/m²). | A small, intense LED can have high luminance even when its total luminous flux is modest. | Increase emitting area, use diffusion, indirect lighting, or optics that reduce uncomfortable glare. |
| Luminous efficacy | The amount of visible light produced per watt of electrical input, measured in lm/W. | Modern LED products commonly achieve approximately 80–200 lm/W at the system level, depending on color quality, optics, temperature, and driver losses. | Select high-efficacy LEDs, efficient drivers, appropriate color settings, and low-loss optical components. |
| Thermal performance | The ability to remove heat from the LED junction, board, and housing. | LED output and service life generally decrease as junction temperature rises; exact reduction depends on the LED design and operating conditions. | Use heat sinks, ventilation, thermally conductive materials, correct mounting, and current levels suited to the design. |
| Drive current | The electrical current supplied to the LED, which affects output, heat, and efficiency. | Increasing current can increase light output, but efficacy may decline and heat generation may rise. | Use a regulated constant-current driver and avoid exceeding the LED or luminaire rated current. |
| Beam angle and optics | The way light is spread, focused, or redirected by lenses, reflectors, and diffusers. | Narrow beams increase intensity in a smaller area; wide beams provide more uniform coverage with lower peak intensity. | Match the beam angle to the distance, target area, mounting height, and required uniformity. |
| Glare and visual comfort | Discomfort or reduced visibility caused by excessive brightness or high contrast in the field of view. | There is no single universal glare limit for every application; evaluation depends on geometry, viewing direction, luminance, and task requirements. | Shield direct views of LEDs, increase source area, use diffusers, reduce excessive contrast, and apply suitable glare-control design. |
| Photobiological safety | Potential eye and skin risks from optical radiation, evaluated by exposure conditions and spectrum. | IEC 62471 classifies lamps into Risk Groups 0, 1, 2, and 3. The applicable group depends on measured radiation, viewing distance, exposure time, and product design. | Use compliant products, avoid staring into high-intensity sources, provide shielding, and follow the manufacturer’s safety instructions. |
| Blue-light exposure | Short-wavelength visible radiation that is included in photobiological blue-light hazard assessments. | Risk is influenced by spectral power, source luminance, distance, and exposure duration—not by color temperature alone. | Avoid direct viewing, reduce unnecessary intensity, use appropriate shielding, and select lighting suitable for the application and exposure period. |
| Flicker | Rapid changes in light output caused by driver or power-supply behavior. | Visible flicker and stroboscopic effects depend on modulation depth, frequency, motion, and individual sensitivity. | Choose well-designed drivers, verify flicker performance, and avoid low-quality dimming systems. |
| Color temperature and color quality | Correlated color temperature indicates the visual warmth or coolness of white light; color rendering indicates how naturally objects appear. | CCT is expressed in kelvins (K), while color rendering is commonly reported using CRI or other color-quality metrics. These values do not directly measure brightness. | Choose CCT and color quality for the visual task; do not use color temperature as a substitute for measured illuminance. |
| Measurement practice | The method used to verify brightness, efficiency, safety, and uniformity. | Use a calibrated illuminance meter for lux, electrical instruments for watts and power factor, and appropriate photometric or safety testing for complete product evaluation. | Measure at the working plane, record distance and ambient conditions, and compare results under the same operating temperature and settings. |
Note: Actual performance depends on LED design, driver quality, operating temperature, optics, installation geometry, and exposure conditions. Safety assessments should follow applicable standards and qualified testing procedures.
It describes visible light output and how clearly that light reaches a surface. Lumens measure total output, while lux measures light on a specific area.
No. Watts describe energy use, not brightness. A lower-wattage LED can produce more light than an older, higher-wattage lamp.
Room size, mounting height, beam angle, and wall surfaces change the result. Light spreads farther and becomes less concentrated.
Place the fixture about 60 centimeters above a workbench to reduce harsh shadows. Adjust the angle toward the working surface, not directly toward your eyes.
Enclosed fittings can trap heat, reducing output and shortening service life. Better airflow may help, but housing design still matters.
Use lumens to compare total output and lux to check illumination at the working surface. A simple lux meter gives more useful evidence than appearance alone.
Yes. Glare, reflections, poor contrast, and unsuitable color temperature can cause discomfort. I once chose the brighter lamp and regretted it.
Check the diffuser, beam angle, driver quality, dimmer compatibility, and ventilation. Narrow optics focus light; wide optics spread it more gently.
Measure lux at night and during daylight, because surrounding light changes perception. Recheck glare, flicker, temperature, and shadows after several hours.
Not always. Shielding, diffusers, distance, and careful mounting can improve comfort without increasing output. More power may create heat instead of useful light.
LED light brightness describes how much visible light a lamp produces and how effectively that light reaches a specific area. It is influenced by LED power, electrical current, color temperature, lens design, heat management, and the quality of the power supply. Brightness should be measured accurately with suitable tools, such as a light meter, while keeping distance, angle, and surrounding conditions consistent. Lumens indicate total light output, whereas lux shows how much light falls on a surface.
To understand how to improve LED light brightness, users can select higher-output LEDs, provide stable current, clean or replace diffusers, improve reflectors, and ensure proper heat dissipation. Keeping the LED cool is especially important because excessive heat can reduce brightness and shorten its service life. However, increasing power without checking the LED’s rated limits may cause overheating, glare, energy waste, or electrical damage. A balanced design should therefore combine strong illumination, efficient energy use, safe operating temperatures, and appropriate brightness for the intended environment.

Tverse LED light